Change the header logo
Use this guide to replace the Smith & Sons logo displayed in the global website header. This process was verified against the active Smith & Sons theme and the current WordPress Customizer.
Before you begin
Prepare the approved replacement logo before opening WordPress.
- Use a clear, high-resolution image.
- Use a transparent background when the approved brand file supports it.
- Do not upload a screenshot of the logo.
- Keep a copy of the current approved logo in the Media Library so it can be restored if needed.
Video walkthrough
The recording demonstrates the complete logo-change process in WordPress. Use the written instructions below as the reference checklist while following the video.
Open the logo setting
- Sign in to the WordPress Dashboard.
- In the left navigation, open Appearance.
- Select Customize.
- In the Customizer panel, select Site Identity.
- Under Logo, select Change logo.
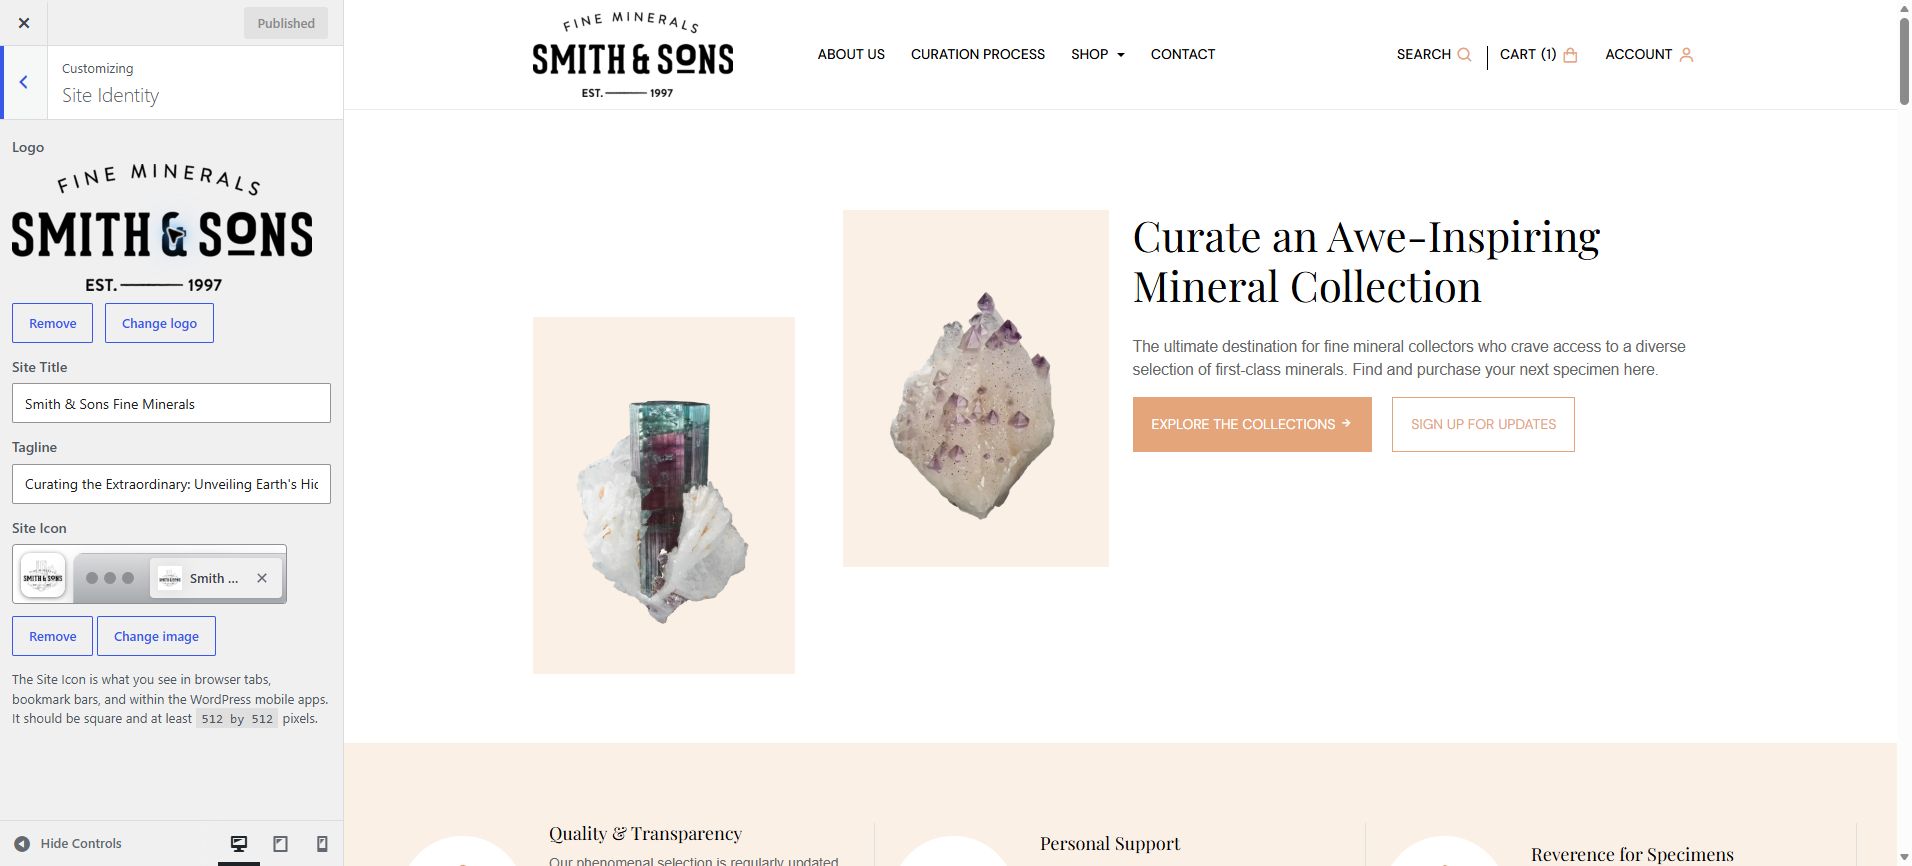
The logo setting is above Site Title, Tagline, and Site Icon. Do not select Change image under Site Icon when you only want to update the header logo.
Select the replacement logo
After you select Change logo, WordPress opens the Media Library.
- Select the approved logo if it is already in the library.
- If it is not present, open Upload files and upload the approved image.
- Enter useful alternative text, such as
Smith & Sons Fine Minerals. - Select the image, then choose Select.
- If WordPress shows a crop screen, keep the complete logo visible. Do not cut off the lettering or the spacing around it.
Review the header preview
The Customizer displays a live preview beside the settings panel. Before publishing, confirm that:
- the complete logo is visible and easy to read;
- the logo is not stretched, blurry, or cropped;
- the main navigation still fits correctly;
- the search, cart, and account controls remain aligned;
- the header works in desktop, tablet, and mobile preview modes.
Use the device icons at the bottom of the Customizer panel to switch between desktop, tablet, and mobile previews.
Publish the change
- Select Publish at the top of the Customizer.
- Wait until WordPress confirms that the change is published.
- Open the public website in a separate tab.
- Check the header on the homepage and at least one internal page.
- Confirm the logo on both desktop and mobile.
If you are only testing the process, close the Customizer without publishing.
Logo and Site Icon are different
The Logo appears in the website header. The Site Icon appears in browser tabs, bookmarks, and WordPress mobile applications. Updating one does not automatically update the other.
Restore the previous logo
Return to Appearance → Customize → Site Identity, select Change logo, choose the previous approved logo from the Media Library, review the preview, and publish the change.